


 If you’re like many contractors, chances are good that a substantial amount of your time is spent fixing someone else’s work. This is especially true when dealing with crawl spaces, where the finished product is hidden from the light of day. And because it’s so hidden, many homeowners will only pick up the phone when things have gotten so bad that its effects have started to impact other parts of the home.
For example, a wavy or humped hardwood floor is a good (and all too common) indicator of a problem in a crawl space resulting in damage to the floors above. Not only is it unsightly, but it can also compromise the home’s structural integrity. Since the root cause is moisture infiltration and retention, your first step should be to find the source. And while there are a number of possible causes, improperly installed closed-cell spray foam insulation could be a likely culprit.
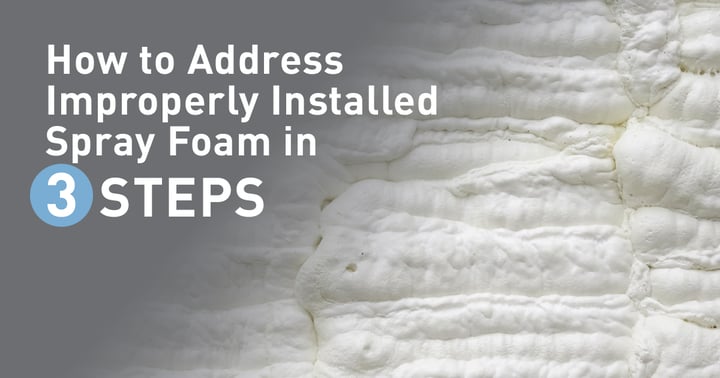
How to Address Improperly Installed Spray Foam
Because closed-cell foam is resistant to moisture and rodent activity, many well-intentioned handymen and homeowners have started to use it as an insulation material in basements and crawl spaces. Its application as an expanding foam makes it a particularly useful option in irregular, tight, or otherwise difficult to access crawl space areas. Don’t get me wrong, spray foam has many beneits with a high R-Value and great air sealing properties. So, when used properly or strategically to seal gaps it can be a great solution in crawl spaces. Unfortunately, spray foam is often installed incorrectly, broadly coated on sill plates and floor joists without necessary considerations or moisture control, like a properly installed vapor barrier in place. This practice can create moisture problems in the crawl space and in the rest of the home because the spray foam can essentially trap moisture in already wet wood and is very difficult to remove. The issues amplify if additional water is introduced (e.g. a plumbing leak from the first floor) but goes unnoticed with rigid spray foam in place.
Many contractors we talk to find themselves needing to address issues resulting from existing spray foam installations. To fix the problems and rescue the crawl space, contractors have relayed the steps they take which generally entails removing the insulation and taking measures to protect the space from further moisture infiltration. If you're on a job where improperly applied spray foam is an issue, the solution often has 3 primary steps:
1: Remove any existing insulation covering the crawl space. Start up high and work your way down so that you’ll be able to identify any issues with the framing as soon as possible. Focus on completely exposing the supporting wood structure of the floor above (the joists) and the materials running along the top of the foundation of your home (the sill plate and rim joist).
2: Once the insulation is removed, make an inventory of where the damage is and how extensive it is in both scope and degree. Don’t just rely on your eyes: Use a screwdriver or awl to probe the wood and see if it’s gone soft. Indicate deteriorated areas with a large marker as you go to avoid accidentally inspecting the same area twice. This is also the time to measure the dimensions of the damaged wood so that you can make a comprehensive shopping list.
3: Now you’re ready to repair any damaged wood. Begin by treating any mold growth as needed with a mold removal solution (rolling it on instead of spraying it avoids spreading spores). Then you can start tackling the structural repairs. Depending on the extent of the damage, you may need to remove some of the framing or sister additional lumber to the joists. Rot that extends to the subfloor above the joists is conceivable but unlikely, and chances are you’ll find repairs will be limited to the sill plate, band board, and floor joists. Because it sits flat, the sill plate often suffers the most damage and frequently needs to be replaced. Raise any joists along the damaged section of the sill plate using a temporary wall, then cut out and replace the damaged material. Not all sill plates are required to be pressure treated, so you may want to check your local code—but if you have any doubts, just go ahead and use pressure-treated material.
If one or more of the joists has sagged or crowned significantly, then they should be brought back into line. Because the lumber in each home reacts uniquely, it’s impossible to give a comprehensive description of the repairs needed, but as a general rule, each sagging joist should be raised with a bottle jack or 2x4 T-brace, then sistered to a new joist. Crowned joists should be braced with temporary supports, then cut at the peak of the crown with a circular saw (and finished off with a reciprocating saw or by hand to avoid damaging the subfloor), allowed to slump into place, and sistered in.
Sometimes the amount of warping in waterlogged wood can be extreme. If you get into a crawl space and find the joists are so curved that it looks like a set of McDonald’s golden arches, then it’s a good time to bring in a structural engineer.
Protecting the Crawl Space Against Moisture
Once the structural materials have been repaired, you can begin to reassemble the finished layers. But, first start by ensuring any existing wood elements are dry and the crawl space stays moisture-free moving forward. Line the floor of the crawl space with a high-quality plastic vapor barrier. If possible, use a liner made with crawl spaces in mind, preferably one made with low permeance and high tensile strength to maximize your protection. This will be especially important if the crawl space is meant to be used as storage space. You may need to allow time for the wood components to dry (a wood moisture meter will allow you to monitor the progress) or bring in a dehumidifier to speed up the process. If you haven't already, it will likely be a prudent step to seal any existing foundation vents as well to keep moist outside air from coming in.
If you choose or need to install insulation on the crawl space walls, bring the insulating material within 3” of the sill plate without covering the plate or any of the other framing. (Many local codes require this 3” gap between where the vapor barrier/insulation ends and the wood sill begins. This allows an inspector to make a visual review of possible termite issues.) Depending on where you’re doing the work, there may be additional steps required to conform to local code. Be sure to take your time to make sure it’s done right.
Be sure to still insulate and air seal the rim joist. This can be a good use for spray foam or a combination of spray foam with rigid foam board or flash and batt approach. If the crawl space is now sealed, unvented, insulated at the walls, and conditioned it is totally within the thermal envelope of the home. So, it doesn’t make as much sense to insulate between the floor framing because the crawl space should closely resemble the interior living space above in terms of temperature and humidity. Unless the homeowner really wants insulation in the sub-floor, I would leave it out to make a visual inspection easier and avoid water problems from festering in the future.
With the crawl space put back together, it’s time to return to the rooms above and reexamine any areas that were growing wavy. The finish materials may have snapped back into place when the joists were repaired, but if they were warped badly enough, you may need to replace some flooring or trim.
The Best Defense Against Moisture Is to Be Proactive
When talking with homeowners, be sure to take the time to educate them about how moisture issues can cause ripples of damage throughout their home. Once they understand the seriousness of the situation they could be facing, you’ll find that a lot of homeowners are willing to get in front of the issue before it becomes a problem, which is the best defense against moisture. In the long run, removing insulation that may be contributing to moisture problems and protecting against further damage, including the installation of a vapor barrier can save your customers a great deal of money and make your repair work more efficient and durable.


Post Comments