.png?width=1500&name=2024StegoCorp-Logo%20(3).png "2024StegoCorp-Logo (3)")


5 Tips and Tricks for Sealing the Terminating Edges of the Vapor Barrier

Your site preparation team has graded your foundation and maybe tamped the earth or placed a granular fill subbase. You’ve rolled out tens of thousands of square feet of your below-slab vapor barrier, the highly-engineered plastic that will protect your slab from the volatile environment below your building. You took great care to overlap the material at the seams by at least six inches, sealing each penetration with diligent detail to prevent any water vapor intrusion around pipes and other conduits.
Download Now: Guide to Sealing the Vapor Barrier at the Slab Perimeter
You get to the edge of your foundation: now what?
If you’ve ever been in this situation, you’ve probably:
- Called the project design team
- Called the product manufacturer
- Scoured ASTM E1643-18a
The process can be maddening, particularly because the terminating edge of every project can be different, neither the designer nor the manufacturer’s representative are on site, and all ASTM E1643-18a – Standard Practice for Selection, Design, Installation, and Inspection of Water Vapor Retarders Used in Contact with Earth or Granular Fill under Concrete Slabs – says about your predicament is this:
Placement:
6.4 Extend vapor retarder over footings and seal to foundation wall, grade beam, or slab at an elevation consistent with the top of the slab or terminate at impediments such as water stops or dowels...
…
6.6 Extend vapor retarder over the tops of pile caps and grade beams to a distance acceptable to the structural engineer and terminate as recommended by the manufacturer.
At which point, you may have considered screaming, “BUT HOW?!?!?!”
Look no further. This helpful guide to under-slab vapor barrier installation will consider the most common slab designs, their terminating edges and how to seal at/to the perimeter of your foundation in accordance with your designer’s specifications and ASTM E1643.
How to Seal the Vapor Barrier at Temporary Concrete Forms: Will You Miss Them When They're Gone?
One of the most common mistakes you can make at the terminating edge of a below-slab vapor barrier installation is attaching the film to some component of the foundation which is intended to be removed later.
If you secure a vapor barrier to a concrete form at the elevation (height) of the slab (see Section 6.4 above), you’ve “sealed” the perimeter of your installation, but only until the forms are removed! The moment those materials are removed, you’ve undone the seal you worked hard to achieve, potentially torn (or at least displaced) your vapor barrier and compromised the entire perimeter of your foundation from the dangerous below-slab environment.
So how do you seal the edge of your under-slab vapor barrier where it approaches temporary concrete forms at your slab’s perimeter? Are you forced to return, after the slab has been placed and the forms removed, and seal the edge of the vapor barrier to the height of the slab? That is an option, but there is a more efficient way!
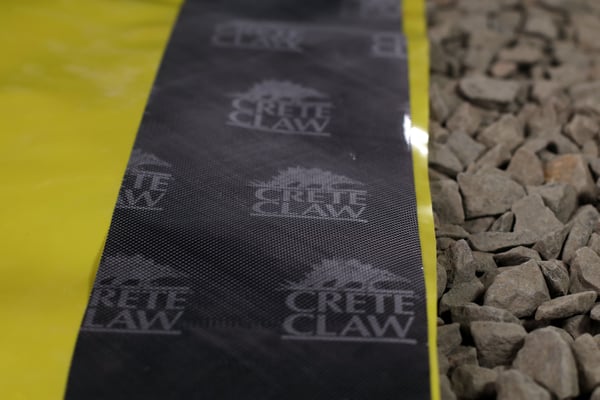
Tip #1: Seal to the Slab with Stego Crete Claw Tape
When ASTM E1643 was updated in 2011 to allow for sealing the terminating edges of the vapor barrier to the slab itself, Stego Industries set about inventing a way to complete your installation without having to return to the slab after form removal. Its solution was STEGO CRETE CLAW TAPE, a patented, multi-layered tape that adheres to the vapor barrier on one side, while allowing fresh concrete to cast into its textured top surface to form a mechanical bond that seals the perimeter of your wrap.
Once your forms are removed, the vapor barrier remains in place, sealed to the slab on the concrete side. No need to return, or spend extra attention or resources sealing post-placement. You finish the job before the slab is cast.
Note: If needing to temporarily secure Stego Wrap in place to the form at the height of the slab, you can utilize strategic sections of Stego Tape to do so prior to installing Stego Crete Claw Tape. The Stego Tape should be cut along the top of the form after concrete is cast and prior to form removal.
.jpg?width=600&name=Final%20Detail%2001%20(1).jpg)
Use Stego Crete Claw Tape when you have temporary concrete forms. Stego Crete Claw Tape will seal to the slab when the slab is placed.
Foundation Walls: In this Case, the Vapor Barrier "Hitting the Wall" is a Good Thing
There are many building designs which call for construction of the exterior foundation walls – with block/masonry or cast concrete, in part or entirely - before placing the concrete foundation.
Under this scenario, your vapor barrier installation will literally hit a wall at the perimeter, but this should never be a figurative obstacle!
In the most straightforward of circumstances, the foundation wall rises vertically where it is met by the perimeter edge of the slab, without impediments (e.g. dowels, water stops, or other protrusions). In this case, the installer’s task is to simply seal the vapor barrier to the vertical foundation wall by extending the vapor barrier far enough to turn up the wall.
When it comes to how high you should turn the vapor barrier up the vertical wall, ASTM E1643 provides clarity here: "at an elevation consistent with the top of the slab." Thus, unless otherwise specified, if your slab is going to be four inches, make sure to turn the vapor barrier up the vertical wall four inches.
Tip #2: Use StegoTack Tape at the Height of the Slab
For Stego Wrap Vapor Barrier installations, Stego recommends using STEGOTACK TAPE, a double-sided adhesive strip which can bond Stego Wrap to concrete, masonry, wood, metal and other surfaces. This super-sticky tape will keep Stego Wrap bonded to the vertical wall after concrete placement, achieving a vapor barrier seal as required by ASTM E1643.
 Bond your vapor barrier to the vertical wall with StegoTack Tape.
Stego Mastic is also an option for sealing Stego Wrap to existing concrete adjacent to the slab. For precise application, Stego Mastic can be applied from a sausage tube with a sausage tube gun.
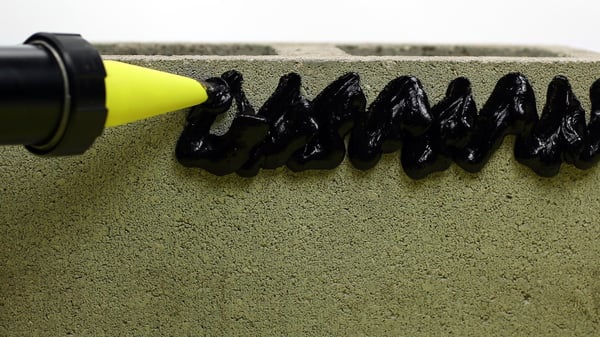 Use Stego Mastic Sausage Tube and a sausage tube gun for sealing Stego Wrap to existing concrete adjacent to the slab.
Where to Seal the Vapor Barrier at Structural Concrete Obstacles: Interior Grade Beams, Footings, and More
Some building designs call for interior structural concrete members, like grade beams, footings, and pile caps or piers, that only rise to the elevation of the vapor barrier and act more like a part of the subbase than a vertical wall. In other cases, these structural components are monolithically cast with the slab. The possible options that exist for detailing these conditions can leave installers pondering an array of appropriate questions: Do I wrap the vapor barrier under my footings? Do I extend it over the grade beams instead? If so, how far do I take the wrap? And what do I use to seal the edge of the vapor barrier?
Existing Foundation Constructions
In many cases, footings, grade beams, piles/pile caps/piers and other structural concrete constructions are created before the under-slab vapor barrier is installed. Whether the vapor barrier should be extended over such sections is something ASTM E1643 weighs in on directly: the vapor barrier should be extended over top of such constructions to a “distance acceptable to the structural engineer.” The primary reason is that adjacent structural concrete members often need to obtain a concrete-to-concrete bond with the slab for effective load transfer (among other reasons). A vapor barrier can interfere with this if not properly located. It is critical that the structural engineer be consulted if plans and specifications are not otherwise clear of the way in which the work should be executed.
Tip #3: Seal at existing foundation constructions with Stego Mastic, StegoTack Tape, or Stego Crete Claw Tape
First and foremost, consult the engineer. If the engineer is comfortable with the vapor barrier fully breaking the bond between the structural member and the subsequently cast slab, no terminating edge (of the vapor barrier) will exist, and therefore no sealing accessory will be necessary. More often, the engineer will state that the wrap must terminate at a certain distance over the existing concrete, or even at the front edge of the construction where its concrete begins. In the former case (partial overlap), STEGOTACK TAPE can be used to seal to the underlying concrete as previously described. STEGO MASTIC, a versatile, water-based asphaltic sealant designed for use with Stego Wrap, can be used in a similar fashion. In the latter case (no overlap), STEGO CRETE CLAW TAPE should be applied fully on the wrap’s terminating edge and represents the best option for sealing to the slab after it has been placed (see Tip #4).
 StegoTack Tape can be used to seal to existing foundation constructions.
Monolithic Placements
Like the example described above— where a concrete-to-concrete bond is often necessary between structural concrete member— the subgrade and slab, in which footings and slabs are cast monolithically, often must achieve a concrete-to-soil bond for structural reasons as well. In this sequence, the below-slab vapor barrier is installed first, and the installer must understand where the vapor barrier should be located.
Here again, consult the structural engineer. In some cases, it may be permissible to the engineer to allow the vapor barrier to wrap completely down and across the trenches cut for footings and other structural members. In other cases, this is problematic, and the installer must either wrap the vapor barrier partially into the footing or stop short of the footing or turndown area in its entirety.
Tip #4: No existing concrete slab to seal to? No problem! Seal the vapor barrier when it is first installed with Stego Crete Claw Tape
Regardless of where the wrap terminates, it is likely in such conditions that no adjacent structural concrete exists against which the vapor barrier could be sealed when the wrap is installed. As a result, the only option is the unique, universal sealing accessory cited several times above: STEGO CRETE CLAW TAPE. Applied to the terminating edge of the wrap, Stego Crete Claw Tape creates a seal to the slab cast against it that is necessary to complete the installation per ASTM E1643.
 If the below slab vapor barrier is installed first with no existing adjacent concrete slab then use Stego Crete Claw Tape to create your seal.
The Biggest Impediment to Vapor Barrier Installation: The Impediments
In each of the scenarios outlined above, nothing is getting in the way of the edge of your vapor barrier installation, making sealing the perimeter an easier and more-straightforward task.
Anyone who has spent any amount of time on a construction site knows the reason perimeter edge sealing is so complicated because of the innumerable things getting in the way: dowels, rebar, water stops, conduits, pipes, you name it.
Getting the vapor barrier pulled out to these edges can be hard enough. Sealing them can seem impossible. However, this is another place were ASTM E1643 provides more-detailed guidance, and maybe some relief: “terminate at impediments.” So, rather than cutting ornate paper doll-like configurations into your highly-engineered film to account for every different impediment around the perimeter, give yourself a break!
What ASTM E1643 omits, once again, is the HOW. In this situation, you can seal your perimeter around impediments employing the same strategies and techniques described above.
Tip #5: Utilize Impediments as the Termination Location and install StegoTack Tape or Stego Crete Claw Tape
In some cases, you may be able to turn the vapor barrier up a portion of the vertical wall at the terminating edge before it runs into rebar or other impediments. If so, you can seal the vapor barrier to the portion of the vertical wall below the impediments using STEGOTACK TAPE, as in the case of a vertical wall free of impediments.
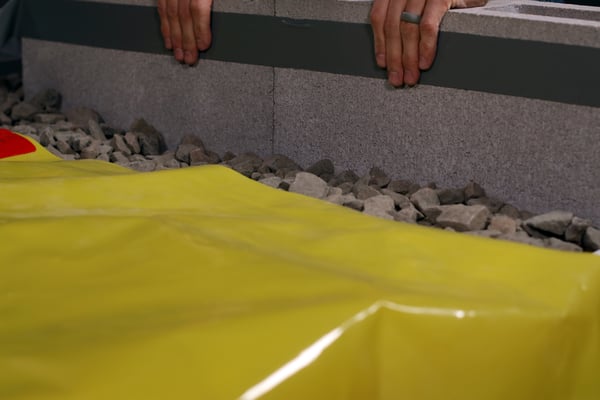
Other slab designs don’t allow for any room to turn the vapor barrier up the vertical foundation wall. In this case, terminate the edge of the below-slab vapor barrier in the horizontal plane, at the impediment and where the subbase and the wall meet. STEGO CRETE CLAW TAPE along the edge of the vapor barrier will bond with the concrete cast against it to create your seal, as required by ASTM E1643 after the concrete has hardened.
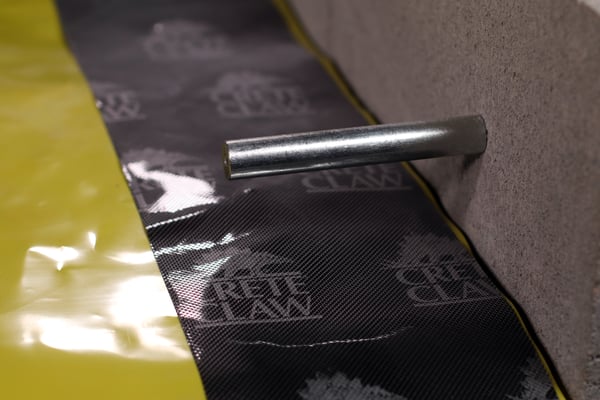 Terminate the vapor barrier at impediments and use Stego Crete Claw Tape to bond the vapor barrier to the subsequently cast concrete.
You can also terminate the vapor barrier where impediments protrude from footings, grade beams, and other structural concrete members. If unsure about what is considered an impediment and what would be considered a penetration, consult the design professional. Typically, impediments occur at the slab perimeter and, as noted, structural concrete (footings, grade beams, etc.). In any case, it is always important to understand if structural or other concerns dictate unique terminating locations of the vapor barrier. When in doubt, consult the design professional. Stego’s nationwide team of experts are also always ready to help.
Check out our step-by-step installation video for more information on how to install Stego® Wrap Vapor Barrier below a concrete slab.
Vapor Barrier Termination Can Be Tricky, but is Vital to Your Slab's Protection
The myriad design scenarios around the edges of building foundations can make for major headaches when installing a vapor barrier.
Stego Industries has tried to ease the complexity of these details by providing a range of installation accessories to make sealing the perimeter easier and more effective.
As frustrating and vague as some of the ASTM guidance may be around how to effectively seal the perimeter, the standard is there for a reason: protecting the entire slab – including the perimeter - with an effective vapor-proofing seal and a monolithic system using a highly-engineered below-slab vapor barrier is critical to protecting the foundation of your building project from expensive flooring failures as well as the harmful effects of mold-causing water vapor, soil gases and other dangerous impacts in the below-slab environment.

Editor's note: This blog post was initially published in January 2019 and has been revised to stay up-to-date.


Post Comments