


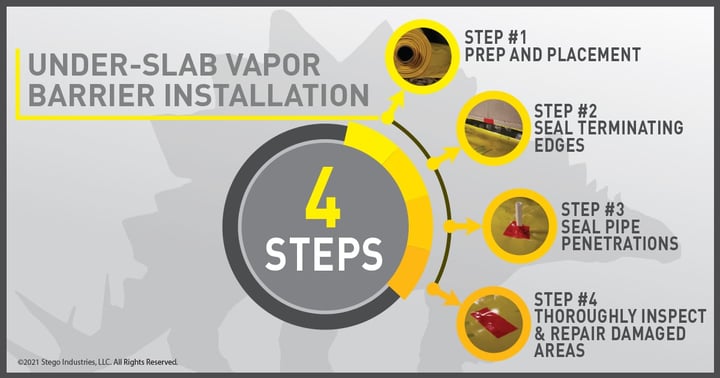
Apply Best Practices and Take Your Vapor Barrier Installation to the Next Level with our Step-by-Step Instructions
When it comes to building construction, there are a lot of moving parts that contribute to successful product and system installations. The “first side of your building envelope” — the system that separates the concrete slab you cast on or below grade from the under-slab environment — is no different; it is vital to the longevity and integrity of the building’s foundation. Since 1998, Stego has focused on providing high-quality materials and unsurpassed support to project teams in order to help protect all elements and people within the building envelope.

That’s why Stego Wrap Vapor Barriers and Retarders are the most widely specified below-slab moisture vapor protection films in North America. Our products’ unique combination of strength, resistance to water vapor permeation, and longevity— and the robust quality control measures we have implemented to verify these features — have contributed to that lofty title, as have Stego’s Life of the Building Warranty and unparalleled project-specific site support.
Selecting the right vapor barrier for your project is the first half of the battle. Then secondly, proper installation is equally important to help ensure your selected products perform. Throughout my career in the construction industry, I have seen a wide range of project conditions lending to diverse installation scenarios and have spent countless hours (quite an understatement) reviewing these various installation conditions to instill confidence in the builder, architect, and owner.
Based on my research in building science, expertise in product development, and deep understanding of the requirements of ASTM E1643 Standard Practice for Selection, Design, Installation, and Inspection of Water Vapor Retarders Used in Contact with Earth or Granular Fill Under Concrete Slabs —a best-practices guide developed over more than two decades — I am here to provide you with expert step-by-step instructions for an effective vapor barrier installation that will make your project a success.
General Project Overview
START TO FINISH: Varies based on project size and number of installation crew members
DIFFICULTY: Easy to moderate; depending on project-specific conditions
INVOLVES: Lifting, cutting, taping, and kneeling
What You Need
TOOLS:
- Utility knife or scissors
- Tape measure
- Work gloves
- Workboots
- Protective eyewear
- Trash/recycling bags
- Towel or rag
- Knee pads (optional)
- Tape roller (optional)
- Bulk sausage/caulking gun (varies on the installation)
MATERIALS:
- Vapor barrier or vapor retarder
- Vapor barrier seam and sealing tape
- Accessories for sealing the perimeter and penetrations, such as:
- Stego® Crete Claw® Tape, or
- StegoTack® Tape, or
-
- StegoTack® Tape Stego® Mastic
Watch our video for a step-by-step guide on how to install an under-slab vapor barrier using Stego products.
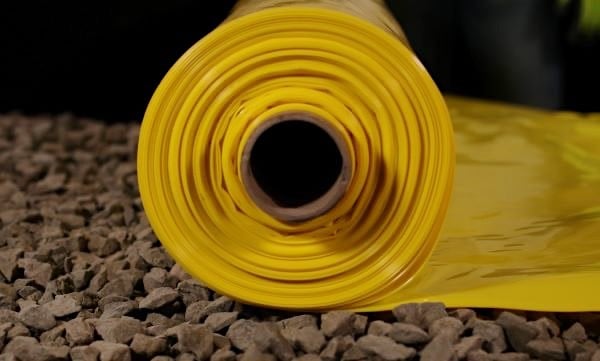
Getting Started – Under-Slab Vapor Barrier Preparation and Placement
A vapor barrier can be installed over an aggregate, sand, or tamped earth base. A cushion layer or sand base is typically unnecessary when using high-performance products — the vapor barrier is tough enough to withstand rugged construction environments.
 Once your base is prepared, as specified by the design professional, begin with the vapor barrier placement:
- Unroll the vapor barrier over the area where the slab is to be placed.
- Unless otherwise indicated by the design professional(s) of record, unfold the vapor barrier to completely cover the placement area.
- Overlap all joints/seams a minimum of 6 inches.
-
Ensure the vapor barrier is clean and dry when applying a manufacturer’s engineered seaming tape or approved method.
Pro Tip: Use a cloth or other means to remove dust, debris, and excess moisture from the vapor barrier prior to applying seaming tape.
- Seal the seams with seaming tape.

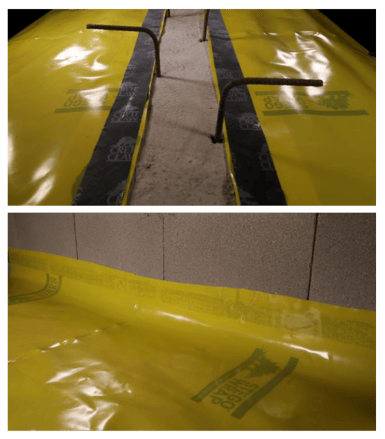
Seal the Vapor Barrier at Terminating Edges
Where to terminate the vapor barrier can differ from job site to job site. Talk with any Stego Representative, and we will always recommend that you consult with the project design team about where to terminate the vapor barrier to ensure vapor protection is located where it is needed. This collaboration will help establish a balance between protecting as much of the building foundation as possible with the vapor barrier coverage, while also avoiding having the vapor barrier potentially compromise any structural considerations that may require bonds between the slab and the earth or other concrete surfaces.
ASTM E1643 instructs to extend the edges of the vapor barrier to terminate at one of the following locations:
- Terminate the vapor barrier at an elevation (height) consistent with the top of the slab; at impediments; or at a location of termination designated by the project design team.
 Regardless of where the vapor barrier is terminated, ASTM E1643 also requires that all terminated edges of the vapor barrier be sealed to the building foundation. That could mean sealing to an existing wall, footing, or even to the new slab that will be placed on the vapor barrier. Since every project is different, having several options for creating a seal, and fulfilling this requirement, is ideal. Lucky for you, Stego provides several innovative accessories to help you seal at the terminating edge of the vapor barrier. One of our most-read articles reviews the different termination conditions and options to seal.

For the remainder of this article, I will refer specifically to Stego’s diverse product offerings.
The first two scenarios described here utilize Stego Crete Claw Tape, a multi-layered tape that mechanically fastens the vapor barrier to the fresh concrete subsequently cast against it. Sealing with this accessory is the most selected method because of its ease of application and versatility to accommodate most conditions.
SECURING STEGO CRETE CLAW TAPE ON HORIZONTAL PERIMETER EDGES:
- Apply Stego Crete Claw Tape as close as possible to the terminating edge of the vapor barrier, but ensure it is not hanging off the edge of the barrier or applied to another surface. The entire width of Crete Claw should be applied to the vapor barrier.
Pro Tip: Applying Stego Crete Claw Tape within 2” of the terminating edge is almost always possible, even when the terminating edges are not cut perfectly straight.
- Install Stego Crete Claw Tape last for a successful installation.
Pro Tip: Install Stego Crete Claw Tape before rebar but after the vapor barrier is sealed at the seams with seaming tape, sealed at penetrations, and terminated at the project’s perimeter and/or other specified terminating location.
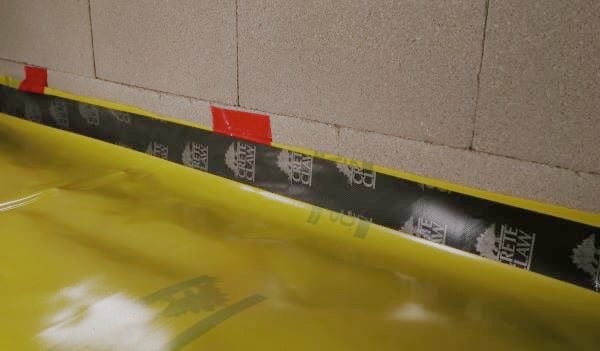 SECURING STEGO CRETE CLAW ON VERTICAL PERIMETER EDGES:
- Extend the vapor barrier up the vertical surface, likely to the height of the slab.
Pro Tip: Temporarily secure the vapor barrier to the foundation wall with a small piece of seaming tape. Trim excess seaming tape after concrete placement and before removal of any adjacent forms.
- Apply the entire 3" width of Stego Crete Claw Tape on the perimeter edge of the vapor barrier.
Pro Tip: Clean the surface of the vapor barrier to ensure that it is free of moisture and debris prior to the installation of Stego Crete Claw Tape.
Where adjacent and existing foundation constructions exist (e.g., stem wall, footing), an alternative to using Stego Crete Claw Tape to seal the wrap’s terminating edges is to use a double-sided tape, like StegoTack Tape. A double-sided adhesive strip can be used to bond and seal the vapor barrier to concrete, masonry, wood, metal, and other surfaces. StegoTack Tape is a flexible and moldable material to allow for a variety of applications and installations.
SECURING STEGOTACK TAPE ON VERTICAL PERIMETER EDGES:
- Remove the release liner on one side of StegoTack Tape and stick to the foundation wall at the height of the slab or at impediments.
- When ready to apply the vapor barrier, remove the exposed release liner from the double-sided tape.
Pro Tip: Store StegoTack Tape in a cool area out of direct sunlight, and whenever possible, minimize the time that elapses between applying the StegoTack Tape to the existing wall and applying the vapor barrier to the StegoTack Tape.
- Press the vapor barrier firmly against the StegoTack Tape to secure.
Pro Tip: If consistent, continuous pressure will not be applied (e.g. by a concrete slab), a PVC termination bar, like Stego Term Bar, may be necessary.
And if that is not enough, here’s yet another alternative method for sealing the vapor barrier at the perimeter to existing adjacent concrete constructions, this time via a mastic-type sealant like Stego Mastic.
SECURING STEGO MASTIC ON EITHER VERTICAL OR HORIZONTAL EDGES:
- Apply Stego Mastic to the foundation wall at the anticipated edge of where the vapor barrier will terminate.
- Press the vapor barrier firmly against the applied mastic on the foundation wall.
Pro Tip: If consistent, continuous pressure will not be applied (e.g. by a concrete slab), Stego Term Bar may be necessary.
The purpose of a high-performance vapor barrier is to stop water vapor and other soil gases from migrating into the concrete slab and building interior. For that reason, imagine taking a bird’s eye view of the project – you want to make sure none of the subgrade is visible, and that’s true around permanent penetrations too (including the underside of horizontal utility penetrations).
Sealing Those Pesky Vapor Barrier Penetrations
Some projects are littered with clusters of pipes and other conduits (e.g., hospitals, laboratories, data centers) while others are mostly bare (e.g., warehouses). Many fall somewhere in between, and it is a rare project indeed that doesn’t have at least a few permanent penetrations of the vapor barrier. Here’s how to address those penetrations.

SEALING AROUND SINGLE PIPE PENETRATIONS:
- Install the vapor barrier around pipe penetrations by slitting/cutting material as needed. Try to minimize the void space between the membrane and the penetration.
- Pull material over and flatten. Clean area of adhesion where Stego Tape will be applied.
- If the vapor barrier is close to the pipe and there’s little to no void space, seal around pipe penetrations with Stego Tape and/or Stego Mastic.
IF VOID SPACE BETWEEN THE VAPOR BARRIER AND THE PIPE CAN'T BE MINIMIZED:
- Cut a detail patch to a size and shape that creates a 6” overlap on all edges around the void space at the base of the pipe.
- Cut an “X” the size of the pipe diameter in the center of the pipe boot and slide tightly over the pipe.
- Seal all sides of the pipe boot with the seaming tape.
- Seal around the base of the pipe using seaming tape. OR... Seal around the base of the pipe with mastic.
Pro Tip: Apply using a disposable glove, paintbrush, or similar.
SEALING AROUND MULTIPLE PIPE PENETRATIONS:
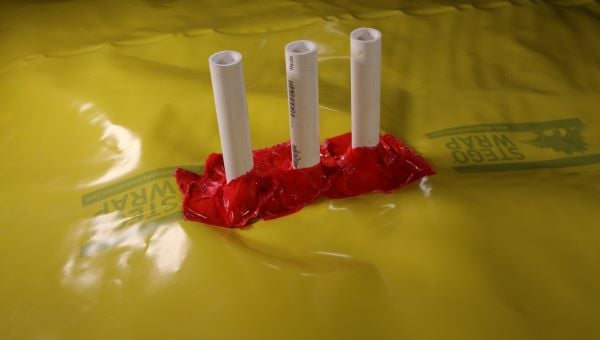
WITH TAPE:
- Cut a slit to accommodate the width of the multiple pipes. Try to minimize the void space created.
- Seal each pipe individually with Stego Tape to ensure there are no unsealed edges of the vapor barrier exposed and no void spaces present around, or in between, the utility penetrations. If the penetrations are too close together to seal the space between them with tape, then Stego Mastic will be the best method to seal them.
- Reminder: You should not be able to see an unsealed path to the subgrade. If void space cannot initially be minimized, follow the corresponding instructions above.
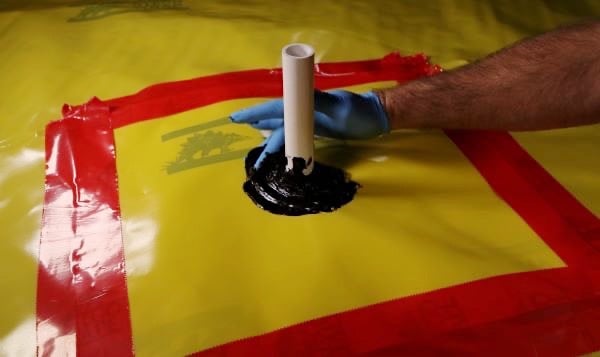
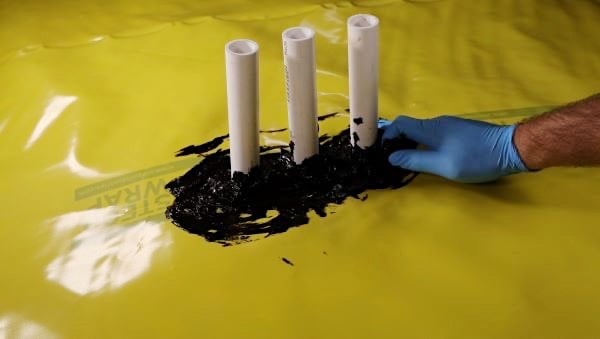 With Mastic:
- Seal any void space around each pipe penetration with Stego Mastic.
- Dab mastic with a disposable glove, paintbrush, or similar, making sure the entire void space is sealed.
- Reminder: Subbase should not be visible from above. If void space cannot initially be minimized, follow the corresponding instructions above.
Thoroughly Inspect & Repair Damaged Areas
While Stego Wrap Vapor Barriers and Retarders are extremely durable, the controlled chaos of a construction site can lead to damage to the vapor barrier during installation. It’s a good idea to review the vapor barrier coverage area for any damaged areas.
Also, be aware that work not yet performed by other trades could also cause damage to the vapor barrier. Slab reinforcing (rebar or mesh), as well as general machine and foot traffic, could lead to punctures or damage to the vapor barrier.
-
Pro Tip: Keep a roll of tape and some extra material on hand to touch up the vapor barrier all the way up to and through concrete floor placement.
Here are more specific steps:
- Small hole(s) or slice(s) in Stego Wrap: Clean the area of adhesion. Center seaming tape over small hole(s) or slice(s) in the vapor barrier.
- Larger hole(s) or slice(s) in the vapor barrier: Clean the area of adhesion. Measure and cut a piece of the vapor barrier to cover the damaged area 6” in all directions. Seal patch with seaming tape.
That’s a “Wrap” - Time to Call for Concrete
 Separating the building from the ground—that is, ensuring the building envelope on the first side of your building is effectively installed— is an important step for the building inhabitants and a great strategy to help ensure the longevity of the other building materials you’ve selected for this project (like flooring). I can’t stress this enough: remember to review ASTM E1643 and consult your design professional (review plans and specifications and seek clarification via RFI as needed) to achieve ultimate compliance. And if going with Stego Wrap, rest assured that project site support from a local representative is just a phone call away.


Post Comments